Interface Overview
CutOptim’s interface is built around a single-page workflow: you enter your materials on the left, the optimized layout appears on the right, and a top bar carries the mode tabs, the live statistics and the export actions. This article explains every area.
The Three Main Areas
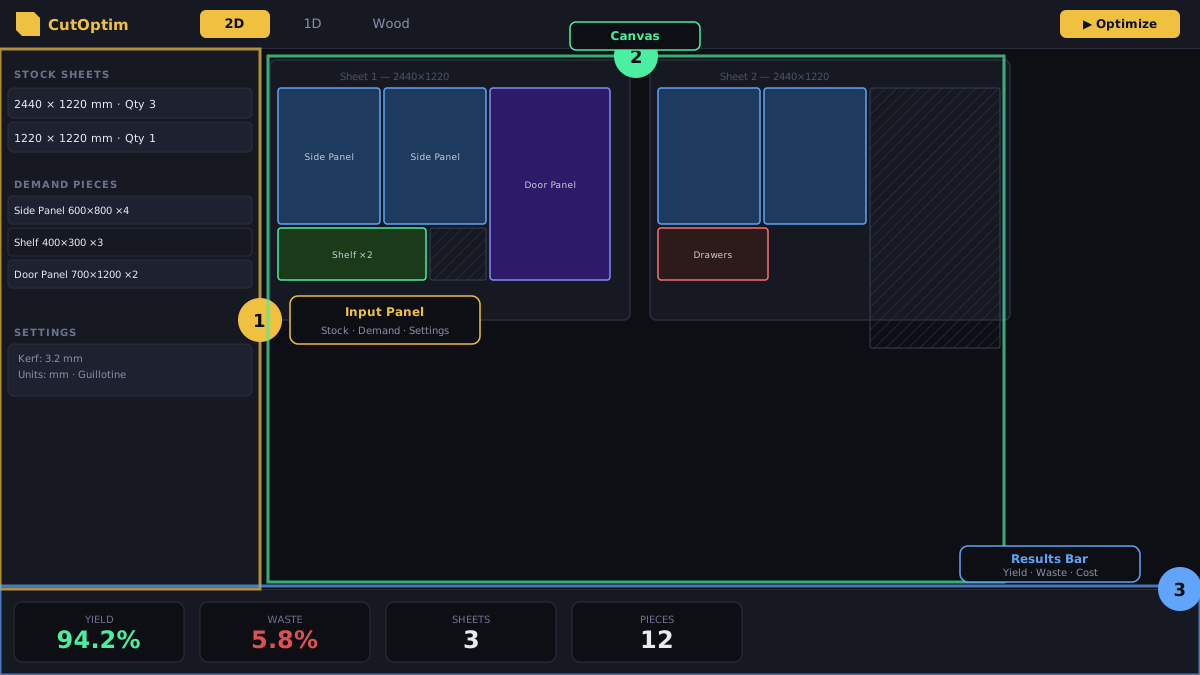
1. Input Panel (Left)
The left sidebar holds everything you type, stacked in this order from top to bottom:
- Settings — units, kerf, trims and the rest, including a More button that opens the supply, Optimization goal, Material-specific mode, Edge Banding and Area-based pricing controls plus six categories — Blade & trim (Kerf tolerance, Trim per side, Oversize per side), Cut plan & machine (First cut direction, Calibration cut, Max. cutting stages, Minimise rotation Workshop and Cut order), Optimization, Cost (Currency, Show price columns, Cost per cut), Grain Matching (the project’s grain-matching switch and a link to the sets) and Export & drawing (what the PDF contains and what is written on the parts). The panel-saw controls appear in 2D mode only; in 1D and Wood the Start / End trim pair takes the place of the per-side grid.
- Custom Fields — your own labelled text fields for the PDF header.
- Stock table — your available raw material (sheets, bars or timber). Each row has dimensions and an optional price. A quantity column and a ★ priority star at the left edge appear only when Sheet supply is set to Limited: star a row and the optimizer reaches for that material first, which is how you burn down old stock before cutting into fresh sheets. In Unlimited (the default) both are hidden — the optimizer takes as many of each size as the plan needs, and the star is not used. Off-cut rows moved in from the Offcut Inventory are starred automatically and are used first, never more than their quantity, in both modes.
- Parts table (headed
Parts (2D),Parts (1D)orParts to cut) — the pieces you need cut. Each row has a colour swatch, a name, dimensions, quantity, and mode-specific columns such as rotation or edge banding. - Grain matching strip (2D Panel, directly under the Parts (2D) table) — groups parts into grain-matched sets, for example a drawer front over two doors cut as one block so the figure runs on. With no set it is one line (Grain matching · Keep the grain flowing across drawer fronts and doors) with an ⓘ and a ✕, shown once a part has a grain direction, a part is named like a door, drawer or front, or a furniture template with fronts was inserted: the ✕ hides it on this device, and from then on the Grain matching switch above the table (next to Edge Banding) shows or hides it. With sets the switch is the project’s On / Off (Off: nothing under the table, the sets are kept); On, the strip shows one chip per set (Set A · Base cabinet A · 3 parts, ✓ or ⚠) and + New set; on Pro also how many runs with sets you have used this month. Clicking it opens the set editor; parts in a set carry an A mark under their row number.
- Offcut inventory — leftovers you saved from earlier runs, ready to feed back in as stock.
- CSV format — a short reminder of the column order each mode expects.
- Run — the primary button, at the very bottom.
Each table’s header carries its own controls: an i tooltip, a Paste button, an Add button, and a CSV ⌄ dropdown holding Import CSV and Template. The Stock table’s header also has a 📦 button for the Material inventory. In 2D Panel mode the stock box also carries a gold-outlined ⚖ Which sheet? button in its own row directly under that header, which compares the sheet sizes you entered and ranks them by the material each would need (details). When Material-specific mode is on, the stock and parts tables gain a Material column, and a row of one-click material chips appears above each box for adding a pre-tagged row — see Material-specific mode.
The Run button sits at the bottom of the sidebar rather than in the top bar, so it stays directly under the data you just typed. Ctrl+Enter runs from anywhere.
2. Canvas (Right)
The canvas shows the optimization result. Each sheet or bar is drawn as a rectangle, with pieces in distinct colours and their labels overlaid. Below the diagram, CutOptim renders the summary: yield, waste, material requirements, offcuts, the “how we optimized” breakdown, and — in limited-stock mode — any pieces that did not fit. A 2D run also reports Cuts (with a saw-passes sub-line) and Cut length, on every plan. A grain-matched set is drawn with a dashed frame and a SET A badge (click it to open the set), and the breakdown gets a Grain matching line with a Compare without grain matching button.
Every part on a drawing carries its number — the row of the Parts table when you ran the optimizer — with the name written along the long side and the dimensions on the edges; the same number is in the cut list below and in the exports. The Results header stays in view while you scroll (desktop and tablet) and holds three buttons: full-width plan (hides the input panel), Shop mode (tap parts and tick cuts at the saw — see Progress Tracking) and clear results.
Before your first run the canvas shows an empty state with a Try with demo data button, which fills all three tables with a realistic sample job.
After a run in any of the three modes, a Cutting Sequence bar sits directly above the sheet or bar diagrams it steps through — not at the top of the whole canvas. Left to right: ◀ Previous, the step readout, ▶ Next, ⏮ Restart (back to step 1) and ▶ Play, which advances automatically. Below the cut list the same plan is listed as a table whose rows are clickable — clicking one jumps the player to that step. It is available on every plan. See Cutting Sequence.
3. Top Bar
- Projects button — opens the project panel (the folder icon, far left)
- Mode tabs — three top-level tabs,
2D,1DandSurface;2Dreveals thePanelandNestingsub-tabs,1Dreveals theLinearandWood cuttingsub-tabs,Surfaceopens Surface mode (paver layouts) on its own page - Zoom in (results) — the magnifier on the right-hand side, next to the statistics: the plan takes the whole window and is drawn larger, and A− / A+ beside it step the size further. Enabled once there is a plan
- Live statistics — Pieces, Yield and Waste, updating as you type and run. On a tablet-width window they give way so that Downloads and Save stay on screen. Once the optimizer has measured savings on this device, a Saved: total joins them — material saved versus a simple layout, added up across your runs
- Downloads — dropdown: PDF, CSV, Excel, SVG, DXF
- Share & Print — dropdown: save offcuts to inventory, print labels, share link, quotation
- Save — saves the current cut (Ctrl+S)
The theme toggle, language switcher and account menu live in the main site navigation above the app, not in the app’s own top bar.
Mode Tabs: 2D, 1D, Wood, Nesting and Surface
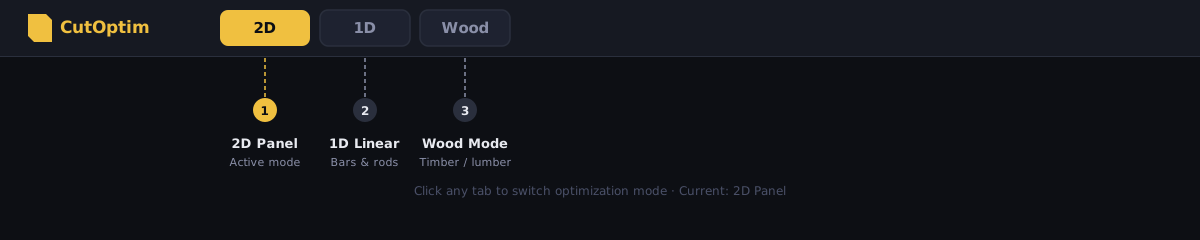
There are three top-level tabs. 2D and 1D each carry two sub-tabs: 2D → Panel and Nesting; 1D → Linear and Wood cutting. The third, Surface, opens Surface mode — paver layouts with a drawing editor — on its own page, whose 2D and 1D tabs bring you back here. Panel, Linear and Wood cutting cut rectangles with a guillotine saw; Nesting is a different class — true-shape nesting of irregular polygons, for laser, plasma and waterjet.
| Mode | Input fields | Algorithm | Best for |
|---|---|---|---|
| 2D → Panel | Width × Length, qty, price | Bin-packing / guillotine | Sheet goods: plywood, glass, metal sheet |
| 2D → Nesting | Polygon outline (SVG/DXF import), qty | True-shape nesting (geometric) | Irregular parts on laser, plasma, waterjet |
| 1D → Linear | Length, qty, price | Linear bin-packing | Bars, pipes, rods, linear profiles |
| 1D → Wood cutting | Width × Height × Length, qty | Linear + cross-section grouping | Structural timber, dressed lumber |
Switching modes does not delete the data in the other modes — all three are stored independently within the same cut.
A single project can contain multiple cuts, and each cut has its own mode. A shop-fitting project might have a 2D cut for the panels and a 1D cut for the aluminium extrusions.
The Project Panel
The Project Panel slides out from the left when you click the Projects button in the top bar. It lists your saved projects; expanding one shows its cuts, and clicking a cut loads it into the workspace. Each project and cut has inline ✏ rename and 🗑 delete buttons, and a search box filters the list.
Projects are stored on CutOptim’s servers, so the same cut opens on any device — but saving is a Pro feature. The free plan cannot save projects or cuts to the cloud; a free user can run and export, while Pro unlocks saving an unlimited number of projects.
If you have run an optimization and have not saved it, clicking a link out of the app opens a dialog offering to save it first — including a chooser for which project and cut to save into. Closing the tab triggers the browser’s own “leave site?” prompt for the same reason.
Mobile Layout
Below 768px the sidebar and canvas no longer sit side by side. Two tabs appear instead — Input and Results — and each takes the full width. Everything above still applies; you just switch between the two halves rather than seeing both at once.
Resizing the input panel and the columns
On desktop and tablet the line between the input panel and the results is a drag handle: drag it to make the input panel wider or narrower (arrow keys work when it has focus; double-click resets it). Every column header in the Stock and Parts tables has a handle on its right edge too — drag it to give a column more room, double-click to reset. A wider column makes the table scroll sideways inside its box rather than squeezing its neighbours. Both are remembered in your browser.
Pressing Run again with nothing changed
The optimizer gives the same plan for the same tables and settings, so a second press of Run optimizer with nothing changed does not run again and does not use one of your optimizations — the app says The plan is already up to date. The same holds for the demo: after Try with demo data, pressing Run on the untouched sample data gives the same answer. Switching the unit (mm · cm · in) with the same tables does not use a run either — the plan is redrawn in the new unit right away (the confirmation says so) and the app shows Same job, only the unit changed. Change anything in the tables or the settings and the next Run counts as usual.
Focus view (desktop)
When you are entering your cut list, the ⛶ button in the top bar expands the input to the full width of the window and hides the cut plan — so the Stock and Parts tables get the whole screen, with no sideways scrolling. The same switch is a small button in the Settings box header, left of the clear button, and — while the view is on — next to the ⓘ of the Stock box, to switch it back. On a wide screen the Stock and Parts tables sit side by side. Run the optimizer and the plan comes back. This view also has a text-size control (A− / A+) that enlarges the input tables for easier reading. On a phone, the Input / Results tabs already give you the same one-panel-at-a-time view.
Guided tour
On your first visit the app offers a short tour: nine steps that point at the mode tabs, Settings, the Stock and Parts tables, the Run optimizer button, the cutting plan, the Downloads and Share & Print menus and the Projects folder. Next and Back step through it, and ✕ closes it. It is shown once per browser; to see it again, click Restart tour in your dashboard (with an account), or add ?tour=1 to the end of the app’s address.
Keyboard
CutOptim has a small set of shortcuts: Ctrl+Enter to run, Ctrl+S to save, and Enter inside a Stock or Parts cell to add a new row. See Keyboard Shortcuts for the full list — it is short, and nothing outside it is bound.
Selling cutting to your own customers
If you run a shop that sells sheet material cut to measure, CutOptim also has a separate Configurator that you embed in your webshop. It is not part of this app interface and has its own subscription.