Progress Tracking
Once your cutting plan is optimised, you still need to actually cut the material. Progress Tracking lets you mark what is cut as you work through the job — a part, a cut or a whole sheet — directly inside CutOptim, without a separate spreadsheet or whiteboard. Every sheet or bar then shows how far it is, and a saved cut shares the marks with your other devices and your team. It is available on all plans including Guest.
The progress badge and the ✓ button exist in 2D Panel and 1D Linear. Wood mode has no badge and no ✓ button on its result cards; there you can tick cuts in the cutting-sequence table, and print the PDF cut sheet for anything else.
How It Works
You mark three kinds of things, and each sheet’s progress is worked out from them:
- Parts — in Shop mode, tap a part on a 2D sheet drawing when it comes off the saw.
- Cuts — tick a row of the cutting-sequence table when the cut is made (all modes, Shop mode or not).
- Whole sheets — the ✓ button in the sheet or bar header marks the sheet as finished in one click.
| Feature | Type | Description |
|---|---|---|
| Not started | status | Nothing marked yet. The grey badge shows the total: 0/19 parts on a 2D sheet, ✂ 0/7 cuts on a bar. |
| In progress | status | Some parts tapped or some cuts ticked. The badge turns amber and counts them — 5/19 parts, or ✂ 3/7 cuts when no part is tapped. In 2D the card gets an amber left border. |
| Completed | status | Every part tapped, every cut of the sheet ticked, or the ✓ button pressed. The badge turns into a green ✓; in 2D the card gets a green left border. |
The badge and the ✓ button sit in the header of each 2D sheet or 1D Linear bar result card, next to the sheet label, dimensions and yield percentage. Pressing ✓ on a Completed sheet sets it back to Not started; if it carried tapped parts or ticked cuts, CutOptim asks first, because those marks are cleared with it.
Marking Progress
- 1
Run your optimisation
Set up your stock and parts as normal, then click Run optimizer. CutOptim generates the cutting plan and shows one card per sheet or bar in the results.
- 2
Find the badge
Every sheet or bar card has a grey badge in its header — 0/19 means none of the 19 parts on that sheet is marked yet. The total above the results (✓ 0/12) counts the Completed sheets and bars.
- 3
Mark parts or cuts as you go
Switch on Shop mode and tap each part when it is cut, or tick the cuts in the cutting-sequence table. The badge counts up in amber: 1/19, 2/19 …
- 4
Finish the sheet
When the last part is tapped or the last cut of the sheet is ticked, the badge turns into a green ✓ on its own. If you did not mark parts as you went, press the ✓ button instead — it completes the sheet in one click.
Shop mode — tap parts, tick cuts
The Shop mode button in the results header (desktop and tablet, once there is a plan) is made for a tablet at the saw. It opens the plan full-width and enlarged, and turns the plan itself into the checklist:
- Tap a part on a sheet drawing when it is cut. It fades and gets a ✓, and the sheet’s badge counts it (
5/19). Tap again to undo. (2D sheets; bars are marked through their cuts.) - Tick a cut in the cutting-sequence table — every row has a tick box, in all three modes, in Shop mode or not. Ticked rows fade and the table header counts
✓ 12 / 61. On a sheet drawing the ticked cut lines stay drawn in green. - Done, next on the Cutting Sequence bar ticks the fence setting you are standing on and moves to the next one that is still open — one button per cut, no scrolling.
- Clear ticks above the table removes every mark of this plan, after a confirmation.
A sheet completed with the ✓ button shows all its parts as cut. Tapping one of them takes just that part back: the badge reads 18/19 and the sheet is in progress again.
The marks belong to one plan: they are stored with a fingerprint of the layout, so running the optimizer again with different parts starts from a clean plan rather than showing ticks on the wrong cuts. The cutting sequence itself needs a free account; tapping parts and the ✓ button work without one.
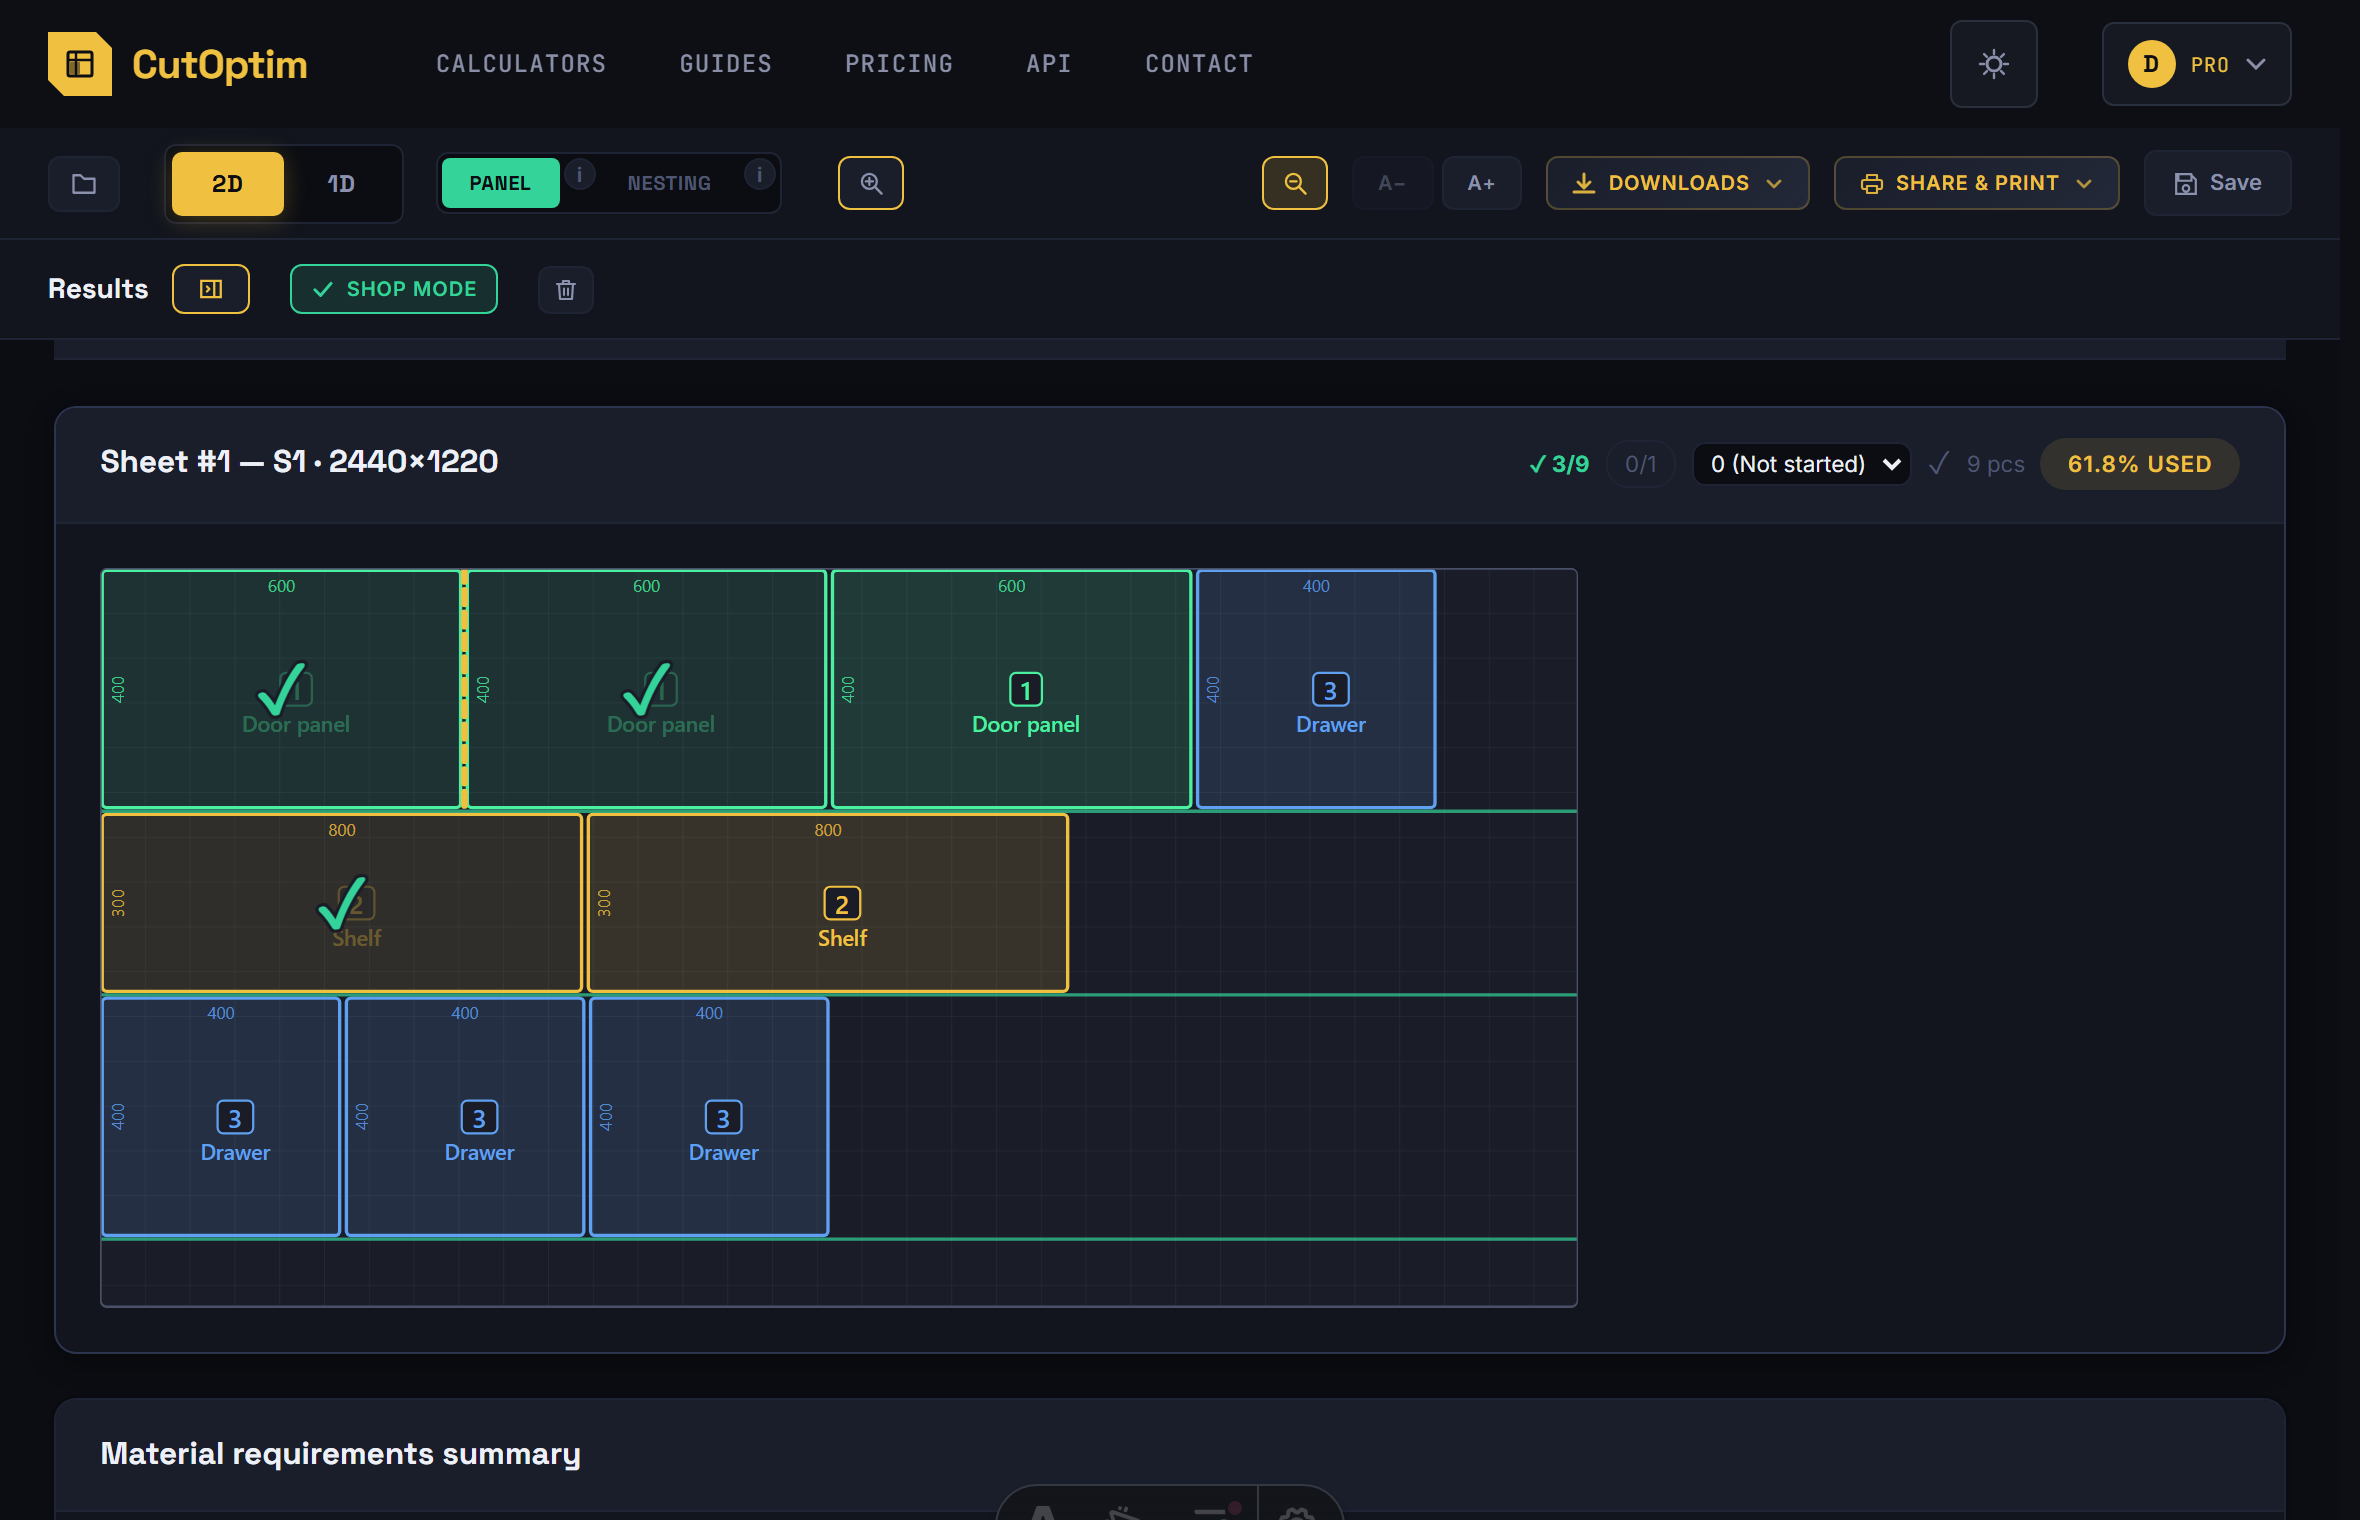
Reading Progress at a Glance
- The badge on each card: grey
0/19(not started), amber5/19or✂ 3/7(in progress), green✓(completed). Both 2D and 1D Linear. - A coloured left border on the card — amber in progress, green completed — so you can scan a column of cards without reading any numbers. 2D only; a 1D bar has the badge but no border.
- The total above the results,
✓ 7/12: how many sheets and bars of the plan are Completed.
Sharing and Saving
Every mark is written to your browser’s localStorage first, so it is instant and works for guests and for cuts you have not saved. If you are signed in and the cut is saved, every mark also goes to the server — the same cut opens on the tablet at the saw with the marks you made at the office desk, and in a Team Workspace your colleagues see them too.
- Marks made before saving go up with the cut when you save it.
- A colleague’s marks appear when you open the cut, when you come back to the CutOptim tab, and every 20 seconds while Shop mode is on. Two people marking different sheets of the same cut do not overwrite each other.
- Re-running the optimizer keeps the marks as long as the plan comes out the same. A different plan starts clean; the saved cut keeps the marks of its saved plan, and saving the new plan into the cut replaces them with the new plan’s marks.
- If someone saved a re-optimised plan into the cut while you still have the old one open, CutOptim tells you and stops writing into it; your new marks stay on your device. Open the cut again to see the current plan and its marks.
Tips for Shop Floor Use
-
Use a tablet next to the saw. Open CutOptim on a tablet mounted near your panel saw or cut-off saw and switch on Shop mode: tap each part as it comes off the saw and press Done, next after each fence setting — no paper checklist needed. On a phone, use the ✓ button of each sheet.
-
Mark parts, not just sheets, when you stop halfway. A half-cut sheet with its cut parts tapped shows
11/19to whoever picks the job up next — on the same device or, for a saved cut, on theirs. -
Scan before breaks. The total above the results and the card colours tell you what is done and what is left before you step away.
-
Save the cut before the job starts. Only a saved cut shares its marks between devices and with the team; marks made before the first save are uploaded when you save.
-
Pair with PDF export for larger teams. The printed PDF cut sheet is the operator’s detailed reference at the machine; the badges and the total are the foreman’s overview.