Bookshelf Cut List Calculator — Sizes and Shelf Span
Enter the outer sizes of a bookshelf and get the exact cut list — plus the free span of every shelf, before it is cut.
Updated: July 27, 2026
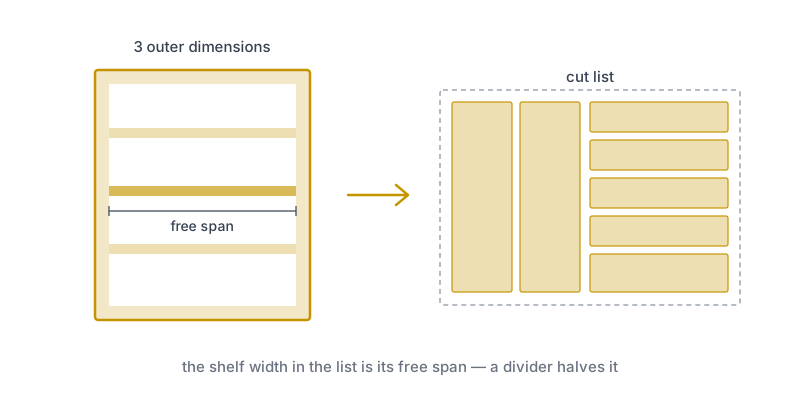
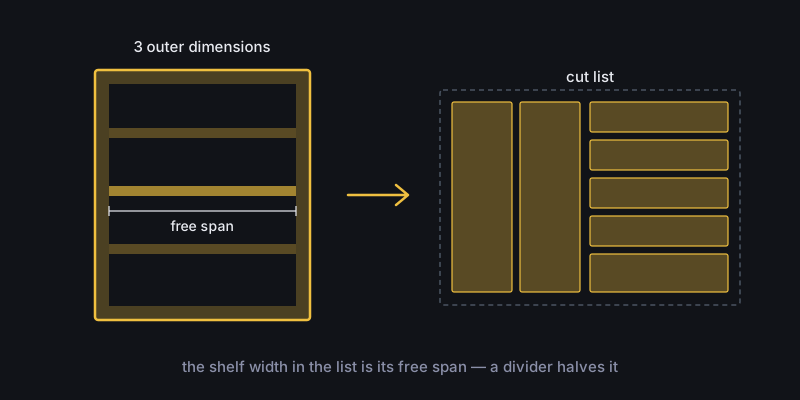
A bookshelf rarely fails on assembly day. It fails six months later, when the shelves are full and the middle of each one has visibly dropped. The cause was already sitting in the parts list: it is not board thickness alone that decides, it is how far the shelf spans unsupported. That number is on the page, and almost nobody reads it before the cutting order goes out.
On a bookshelf, the shelf’s width in the cut list is the same thing as its free span. Whatever stands between the sides has to carry itself; everything else is carcass. This calculator hands you both at once — the finished sizes of every part, and among them the span you need to weigh against what you intend to put on it.
The default is an 800 × 1800 × 300 mm bookshelf with four shelves. The shelf comes out at 764 mm — that is the span. Add one divider: 764 becomes two bays of 373 mm, and the shelf count doubles with it.
How do you use this calculator?
-
Pick the bookshelf
The template uses the same carcass logic as the others: the top and bottom run the full width and the sides fit between them.
-
Enter the outer sizes
Width, height, depth — the three numbers you measure against the wall. The calculator subtracts the board thickness for you.
-
Check the span
The shelf’s width in the table IS its free span. If that looks long for your material, add a divider and watch it halve.
-
Take it to the optimizer
Download the CSV and import it, or open the app directly. How many sheets you need and in what layout is the optimizer’s answer.
Why is the span the number that matters?
Because it is the one dimension in the piece that does not announce itself. A depth that is too generous costs material and you see it immediately. A height that is too tall costs space and you see that too. A span that is too long shows up only under load, once everything is glued up and filled.
The calculator makes it visible by giving the shelf as a part rather than as an “internal dimension”: the 764 mm in the table is not an intermediate step in a sum, it is the piece of board that will later be hanging between the sides.
The calculator deliberately names no maximum span. It depends on the material, the thickness, how the ends are supported and what goes on top — a general figure here would be false precision. Hold the number it gives you against your board maker’s guidance, or against a shelf you already know stays flat.
What does a divider actually change?
It halves the span and doubles the shelf count, in the same movement.
An 800 mm carcass in 18 mm board leaves 764 mm of clear width. A divider takes its own 18 mm out of that and the rest splits: two bays of 373 mm. Four full-width shelves become eight shorter ones — more parts, more edges to finish, but a span well under half the original.
Whether that trade is worth it is a materials question, not an arithmetic one. The point is that you can see both versions in the same table before you order anything.
| Part | Visible? | Grain | Why |
|---|---|---|---|
| Side | Yes, full height | Fixed | The most conspicuous face on a tall unit |
| Top | Yes, on a low unit | Fixed | Fully in view at eye level or below |
| Shelf | Front edge only | Free | Hidden, allows better yield |
| Divider | Front edge only | Free | Hidden, allows better yield |
| Back panel | No | Free | Separate material, keeps the carcass square |
Common mistakes
Never looking at the span. The most common case and the most expensive: the list goes out, the shelves come back at outer width minus two board thicknesses, and nobody asked whether that distance carries.
Forgetting the board thickness on the sides. The top and bottom run through, so the side is two thicknesses shorter than the unit is tall. Cut to the full outer height, the bookshelf ends up 36 mm too tall — and no longer fits under the shelf, the window sill or the ceiling it was measured for.
Counting the back panel as carcass board. 3–8 mm hardboard does not belong in the same materials line as 18 mm board; area and sheet count both come out wrong. The calculator keeps it separate.
Subtracting the kerf from the part size. The list holds finished sizes. The kerf is consumed inside the sheet between the parts and is the optimizer’s job — take it off in advance and every part comes back undersized.
When should you not use this?
On shelving that is not a sheet-goods carcass: a ladder-style unit, a mortised solid timber frame, individual floating shelves with no sides at all. The model does not describe those.
Nor when your parts list already exists and all that is missing is the layout on the sheets — that is where the board cutting calculator starts.
Hole patterns for shelf pins are deliberately absent: spacing and drill diameter follow the system you choose and vary by manufacturer.