How to Build a Fence: Posts, Rails & Picket Cut List
Two people build the same 15-metre picket fence. One buys a pile of 3-metre boards, cuts each post and picket as they go, and ends the weekend with a bin full of short offcuts and a second trip to the merchant. The other writes down every piece first — posts, rails, pickets — and lets a cutting plan tell them exactly how many boards to buy. Same fence, same timber; the difference is that a fence is a list of lengths, and a list of lengths has a right answer.
What you’ll learn in this guide:
- The three parts of a fence and why planning one is a 1D cutting problem
- How deep to set posts and how far apart to space them
- How to count pickets, boards, and rails without guessing
- How to turn the list into a buy-the-least-timber cutting plan
What Materials Does a Fence Need?
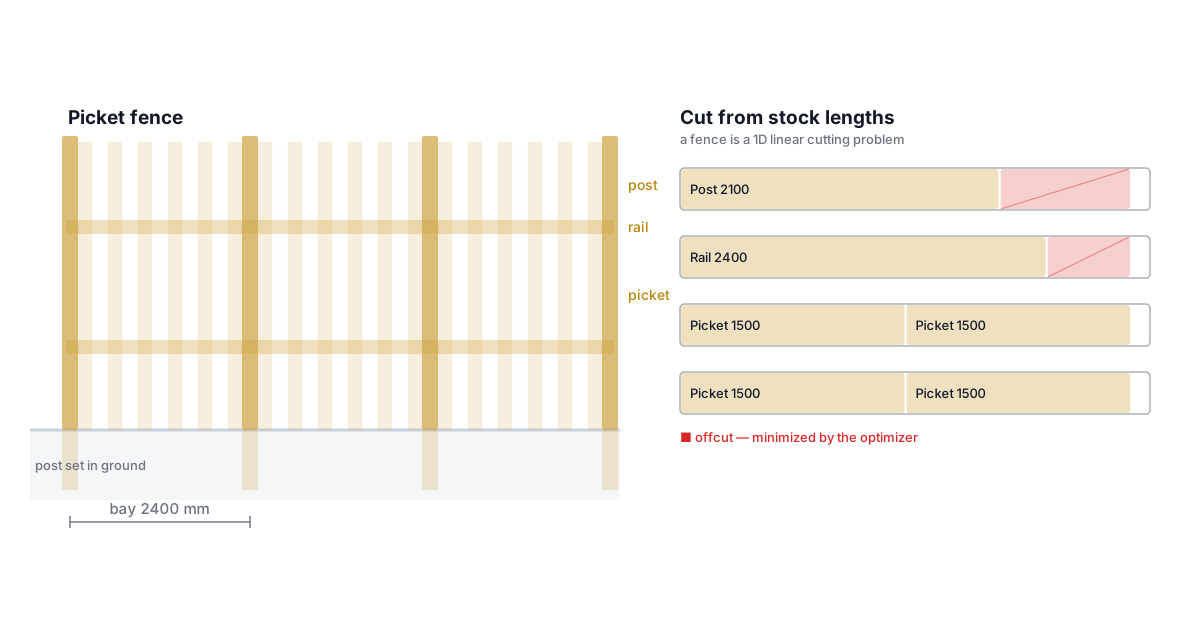
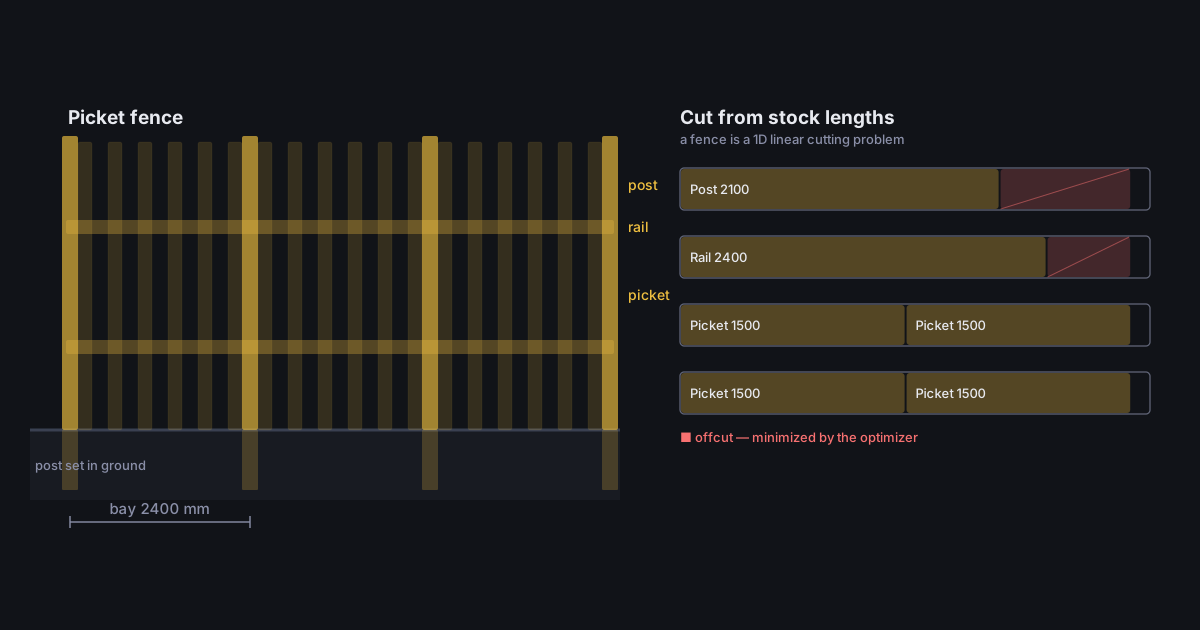
A timber fence is built from three kinds of linear part: posts set vertically in the ground, rails running horizontally between the posts, and cladding — vertical pickets or horizontal boards — fixed to the rails to fill the face. Every one of them is cut to length from stock timber, which is what makes fence planning a one-dimensional cutting-stock problem: the only dimension that matters for buying and cutting is length.
That framing is the whole trick. Once you have a list of lengths and quantities — so many posts at one length, so many rails at another, so many pickets at a third — planning the fence is no longer a woodworking question, it is an arithmetic one, and it has a best answer you can compute instead of guess. A fence is just a repeating pattern of those three parts along a run, so the counts fall straight out of a handful of measurements.
How Deep Should Fence Posts Go?
Set about one third of the post’s total length below ground, and never less than roughly 600 mm — with the base below your local frost line so seasonal heave cannot push the post up over the winters.
This is the number that trips up first-time fence builders. The height you want to see is not the length you cut. A 1.5 m fence on posts buried 600 mm needs posts cut to 2.1 m, and if you buy 1.8 m posts because that is the fence height, you have nothing left to concrete in. Always cut the post to height plus embedment, and account for that extra length in the timber you order. In frost-prone ground the embedment is set by the frost line, not by a rule of thumb — check the depth for your region before you dig.
Rails and cladding have no such hidden length: a rail is one bay long, and a picket is the fence height. Only the post carries an invisible part, which is exactly why the post is usually the longest piece you cut — and the one that decides the minimum stock length you need to buy.
How Far Apart Should Fence Posts Be?
Post spacing runs from about 1.8 m to 2.4 m centre to centre, with 2.4 m common for picket and panel fences. Closer posts stiffen the fence against wind and sagging rails; wider posts use fewer posts and less concrete. The choice is a trade-off, not a rule.
The spacing drives the whole part count. Divide your total run by the spacing and round up — the last bay is nearly always short, and you cut a full post for it anyway. That rounded-up figure is the number of bays; add one for the number of posts. Two rails per bay is standard for a fence up to about 1.2 m; taller fences take a third rail in the middle so the cladding cannot bow. Each rail is one bay long, and there are as many rails per bay as you chose — so once the bay count is fixed, the rail count is fixed too.
| Part | Length you cut | How many |
|---|---|---|
| Post | Fence height + embedment | Bays + 1 |
| Rail | One bay (post spacing) | Bays × rails per bay |
| Picket (vertical) | Fence height | Run ÷ (picket + gap) |
| Board (horizontal) | One bay | Bays × rows up the height |
These are the four relationships behind every fence cut list. Change the run, the height, or the spacing and the counts move with them — which is precisely the kind of bookkeeping a calculator should do for you.
How Many Pickets and Boards Do You Need?
Add the picket width to the gap between pickets to get the pitch, divide the run by the pitch, and round up. For 90 mm pickets with a 45 mm gap the pitch is 135 mm, so a 15 m run takes about 112 pickets. Horizontal boards work the other way: count how many board-plus-gap rows fill the height in one bay, then multiply by the number of bays.
Rather than run those sums by hand for every change of mind, set your fence up below and read the full cut list straight off. Pick a fence type, enter the run, height, and spacing, and the tool lists every post, rail, and picket with its length and quantity — then hands the whole list to the optimizer.
The stock lengths figure it shows is the theoretical minimum — total timber divided by one stock length. The real number depends on how the cuts nest along each board, and that is what the optimizer computes when you carry the list into the app.
How Do You Cut Fence Timber with the Least Waste?
You cut fence waste by treating the whole part list as one cutting job and arranging it across real stock lengths, instead of pulling a fresh board for each piece.
Measure the run and choose a fence type
Measure the total length of fence and pick a style — picket, horizontal board, or post-and-rail. The style decides which parts you cut and how the cladding fills the run.
Set the post spacing and count the bays
Choose a post spacing (commonly 1.8–2.4 m centre to centre), divide the run by it, and round up for the bay count. The post count is the bays plus one.
Add the post embedment to the post length
The post you cut is the visible height plus the part set in the ground — about one third of the height, at least 600 mm. Cut posts to that total, not to the fence height.
List the pickets or boards across the run
For vertical pickets, divide the run by the picket-plus-gap pitch. For horizontal boards, count the rows that fill the height in each bay. Add the rails: one bay long, times the rails per bay.
Optimize the cut against your stock lengths
Feed the full part list and your stock length into a 1D linear optimizer. It arranges the cuts across the fewest boards and shows the offcut, so you buy the right amount of timber.
Timber waste on the same fence — cutting board-by-board vs optimizing the whole list
The visual shows offcut waste dropping on the same job once the parts are packed properly (illustrative figures — your result depends on the mix of post, rail, and picket lengths against your stock). On a long fence of repeated lengths, a good arrangement routinely saves whole boards. The same 1D optimization is covered for steel in the metal cutting optimization guide — a fence and a rebar schedule are the same problem in different material.
Common Mistakes When Planning a Fence
Cutting posts to the fence height. The post is the fence height plus the embedment. Buy and cut them to the full length, or you concrete in nothing and the fence is short on day one.
Optimizing against a stock length you can’t buy. Entering a convenient round length that your merchant does not stock produces a plan that falls apart at the saw. Set the stock length to what is on your delivery — commonly 2.4 m, 3 m, 3.6 m, 4.8 m, or 6 m softwood.
Forgetting the short last bay. A 15 m run at 2.4 m spacing is 6.25 bays, which is seven bays and eight posts — not six. Always round the bay count up, and count a full post and full rails for the short bay.
Buying board-by-board. Pulling a fresh board for each cut leaves a bin of unusable ends. List every piece first and let the optimizer nest them, so two short pickets share the offcut a single long post leaves behind.
When a Fence Isn’t a Simple Cut List
A flat, straight run of one fence style is a clean 1D cutting job. A few things push it past that. On a sloped site you either step the panels — each bay a slightly different height, so the cut list has several picket lengths — or rake them, which changes the cut angles. Gates are their own sub-assembly with a braced frame, not part of the repeating pattern. And a fence that also retains soil is a structural wall with different post sizes and footings, not a cladding job.
For everything that is a repeating run — the overwhelming majority of garden and boundary fencing — the cut list is the plan, and optimizing it against your stock is the difference between one trip to the merchant and two. If your fence mixes styles or steps down a slope, split it into flat sections, plan each as its own run, and add the section lists together. See 1D vs 2D cutting optimization for where linear planning stops and panel work begins.
Turn your fence measurements into a buy-the-least-timber cutting plan.
Pick a fence type, enter the run and height — the 1D optimizer lists every post, rail and picket and arranges the cuts. No signup required.
Plan your fence cuts freeFrequently asked questions
What materials do I need to build a fence?
How deep should fence posts be set in the ground?
How far apart should fence posts be?
How do I calculate how many fence pickets I need?
Can I use a cutting optimizer to plan a fence?
What length timber should I buy for a fence?
Related
Ready to optimize your cuts?
2 free runs without an account, then 3 a month with a free account
Open App