Wardrobe Cut List Calculator — Sizes and Hanging Height
Enter the outer sizes of a wardrobe and get the exact cut list — plus the hanging height left in each bay, before anything is cut.
Updated: July 27, 2026
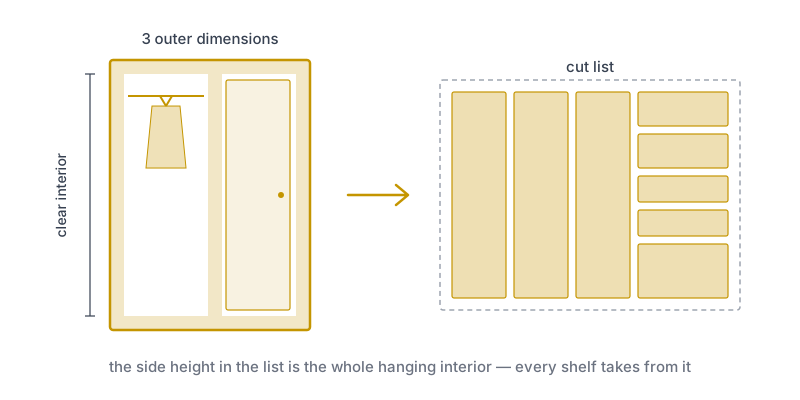
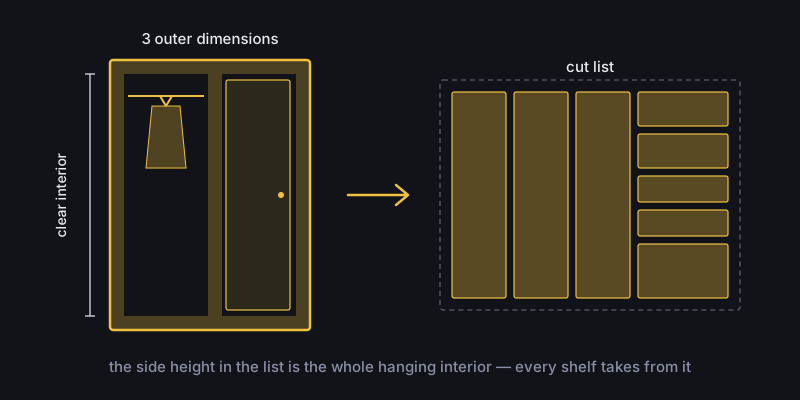
A home-built wardrobe rarely fails structurally. It fails because the coats drag on the bottom. Split a two-metre carcass down the middle and you picture two roomy bays — then discover on moving-in day that neither is long enough to hang anything full-length. The number that would have settled it was already in the parts list.
On a wardrobe, the side’s height in the cut list is the same thing as the whole clear interior. Every shelf you add comes off that total, including its own board thickness. This calculator shows both at once: the finished sizes of every part, and the interior you need to measure your wardrobe contents against.
The default is a 1000 × 2000 × 550 mm wardrobe. The side comes out at 1964 mm — that is your entire interior. Pull the shelves slider up and watch how quickly nothing hangable is left.
How do you use this calculator?
-
Pick the wardrobe
The template uses the same carcass logic as the others: the top and bottom run the full width and the sides fit between them.
-
Enter the outer sizes
Width, height, depth — the three numbers the alcove or wall gives you. The calculator subtracts the board thickness for you.
-
Check the hanging height
The side’s height is the whole clear interior. Every shelf divides it — add only as many as still leave a bay long enough for what you hang.
-
Take it to the optimizer
Download the CSV and import it, or open the app directly. How many sheets you need and in what layout is the optimizer’s answer.
Why does the hanging height have to be settled first?
Because it is the one measurement you cannot enlarge afterwards. A door can be swapped, a shelf moved, a rail rehung — but the interior is fixed by the outer height and the board thickness before the first cut is made.
On a 2000 mm outer height, 1964 mm remains. That sounds generous until you divide it: a single shelf turns it into two bays adding up to only 1946 mm, and the difference is the shelf itself. Where exactly you put it decides whether the lower bay is somewhere to hang things or merely somewhere to stack them.
The calculator deliberately names no recommended hanging height. What you need depends on what ends up in the wardrobe — shirts, jackets and coats differ considerably. Measure your longest item on its hanger and hold it against the interior the list gives you.
What does the calculator do with the doors?
It treats them as inset: the bay opening minus 3 mm of clearance on every edge, rounded down.
The rounding is not a detail. With two doors side by side, rounding up would make them wider together than the opening — they simply would not close. For the same reason every edge gets its own reveal, not just the meeting stile.
If you are building with overlay doors the sizes differ: the door then covers the carcass edge instead of sitting between them. The carcass parts from the list still hold; the door sizes would need converting.
| Part | Visible? | Grain | Why |
|---|---|---|---|
| Door | Yes, from the front | Fixed | Doors sit side by side, the grain has to run on |
| Side | Yes, full height | Fixed | The largest visible face on a tall carcass |
| Top | Rarely, it is high up | Fixed | Kept fixed so its edge matches the side |
| Shelf | Front edge only | Free | Hidden, allows better yield |
| Divider | Front edge only | Free | Hidden, allows better yield |
| Back panel | No | Free | Separate material, keeps the carcass square |
Common mistakes
Placing the shelves before the hanging height is decided. The mistake this article opened with. Decide what has to hang, then divide — not the other way round.
Forgetting the board thickness on the sides. The top and bottom run through, so the side is two thicknesses shorter. Cut to the full outer height and the wardrobe stands 36 mm too tall, which is enough to stop it clearing a tight ceiling.
Ordering doors with no reveal. Without clearance at the edges they bind, and with two side by side the error compounds. The calculator leaves 3 mm per edge and rounds down.
Counting the back panel as carcass board. 3–8 mm hardboard does not belong in the same materials line as 18 mm board — area and sheet count both come out wrong.
When should you not use this?
On a fitted wardrobe that closes directly against wall and ceiling: those often have no carcass of their own, only battens and filler panels making up the gap. Nor on sliding doors — their sizes follow the track system, not the bay opening.
If your parts list already exists and only the sheet layout is missing, the panel cutting optimizer is the entry point.
Hinge boring is deliberately absent: cup position, drill pattern and clearance follow the hinge system you choose and vary by manufacturer.