What Is Material Yield (Sheet Utilization)?
Quick answer
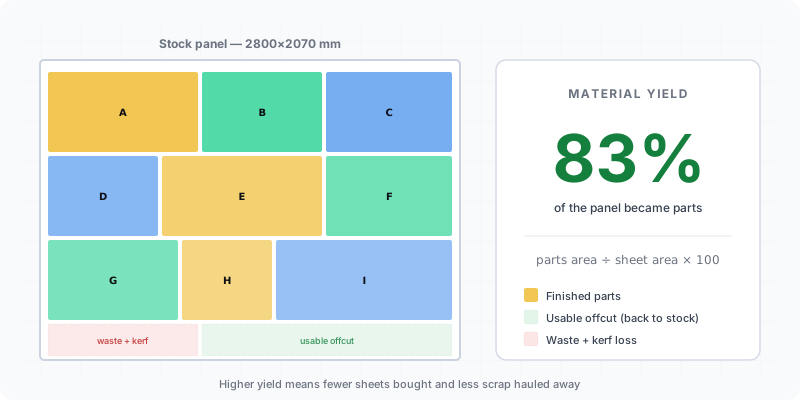
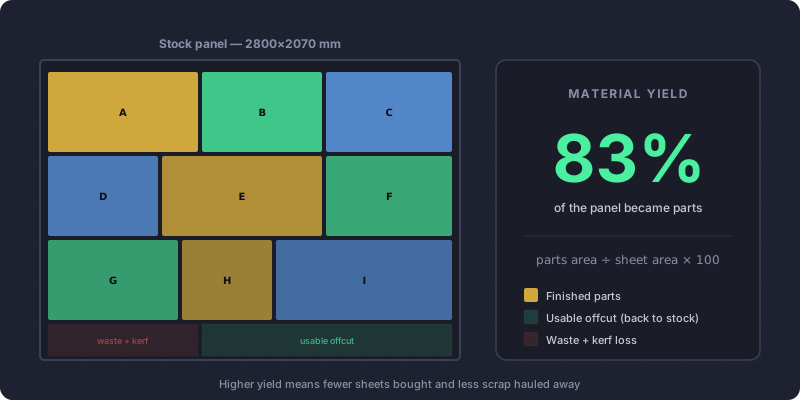
Material yield is the share of a stock sheet or bar that leaves the shop as finished parts: total part area divided by the stock area consumed, as a percentage. It is not the inverse of waste — the material the blade turns to dust is a third category, so the two never sum to exactly 100 %.
Two cabinet shops take on the same 24-part job and cut it from the same 2800×2070 mm melamine panels. One shop buys six sheets; the other buys eight. Same parts, same saw — the gap is material yield: the share of every panel that leaves the shop as a finished part instead of ending up in the scrap bin. Read that number wrong and you overpay on material for every job you run.
What you’ll learn in this guide:
- What material yield (sheet utilization) means and how it is calculated
- The difference between yield and waste — and why they don’t add up to exactly 100%
- What a realistic yield target looks like for panel and linear cutting
- The five factors that quietly drag your yield down, and how to lift it
What Is Material Yield?
Material yield is the percentage of a stock sheet or board that ends up as finished parts rather than waste. It is also called sheet utilization or the material utilization rate, and it is the single number that tells you how efficiently you turned purchased material into product.
The math is a ratio, expressed from 0 to 100%:
Material yield (%) = (total area of all parts ÷ total area of stock used) × 100
For 1D or linear stock — rebar, extrusion, edge banding, dimensional lumber — you swap area for length: total length of parts divided by total length of stock. Either way, yield answers one question: of everything you paid for, how much walked out as product?
Yield is the flip side of material efficiency as a whole. A high yield means less material bought, fewer sheets handled, and a smaller scrap pile to haul away — which is why it shows up on the results screen of every serious cutting optimizer — software built to solve the cutting stock problem.
How Do You Calculate Sheet Utilization?
To calculate sheet utilization, divide the combined area of your finished parts by the total area of the stock sheets you used, then multiply by 100.
Here is a worked example (illustrative — your real numbers depend on your part list). A single 2800×2070 mm panel has a gross area of about 5.796 m². Say your layout places parts totaling 4.8 m² of finished pieces on that panel. The yield is 4.8 ÷ 5.796 = 0.828, or roughly 83%. The remaining ~17% left the panel as offcuts, kerf dust, and edge trim.
The important detail: you divide by the stock you actually used, not the stock you bought. If you open a second panel just to cut one small part, that whole second panel counts against your yield — which is exactly why buying the right number of sheets matters as much as arranging them well.
Waste on the same job — before vs after optimization (yield is the mirror image)
The visual above shows waste dropping from 40% to 12% on the same parts. Flip it around and that is yield climbing from 60% to 88% — the same layout, described from the other side.
What Counts as a Good Material Yield?
A good material yield depends on your part mix, but well-optimized panel cutting typically lands in the mid-80s to low-90s percent, while manual layouts often sit below 75%. There is no universal target — a job full of identical shelves will always out-yield a job of thirty odd-sized parts.
The table below mirrors the waste rates we measure across cutting projects (see how to reduce wood waste), read as yield instead of waste. Treat the figures as approximate: kerf turns a sliver of every cut into dust, so real yield runs a touch below the pure area ratio.
| Planning method | Typical yield | Why |
|---|---|---|
| Manual (pencil & paper) | ~72% | First-fit placement leaves gaps a rearrangement would have filled |
| Spreadsheet tracking | ~78% | Reports utilization after the fact but can't test rotations or reassignments |
| Optimization software | ~89% | Evaluates hundreds of layouts and respects kerf and grain |
| Theoretical maximum | 100% | Only when parts tile the stock exactly — rare in real jobs |
Chasing the last few points of yield has diminishing returns. Going from 72% to 88% saves real sheets; squeezing 88% to 90% might cost more in planning time than the offcut is worth. The goal is not a magic number — it is closing the gap between your layout and the best one available for your parts.
What Drives Material Yield Down?
Five things quietly lower material yield: blade kerf, grain-direction locks, a wide spread of part sizes, guillotine cut constraints, and ignored offcut inventory.
- Kerf. Every pass turns a strip of material into sawdust. Ignore it and the reported yield is a fantasy — the parts won’t fit. See what is kerf allowance.
- Grain direction. Grain-sensitive parts can’t be freely rotated, so the optimizer has fewer ways to pack them and gaps open up.
- Part-size spread. A layout of many different odd sizes tiles worse than a layout of a few repeated sizes. Variety is the enemy of tight packing.
- Guillotine constraint. Saws that can only make edge-to-edge cuts can’t reach every nesting arrangement a CNC router can. See guillotine vs free-cut nesting.
- Ignored offcuts. Cutting every part from full sheets while usable offcuts sit on the rack is pure lost yield — that material is already paid for.
How to Improve Material Yield
You improve material yield by giving the optimizer more freedom and better inputs: an accurate kerf, permission to rotate non-grain parts, grouped thicknesses, and a stocked offcut inventory.
Set your kerf from a real test cut
Measure the slot a scrap cut leaves with calipers rather than trusting the blade’s spec sheet. An accurate kerf means the yield you see is the yield you can actually cut — not an optimistic estimate that leaves parts short.
Allow rotation wherever grain permits
Every part you let the optimizer rotate is another arrangement it can try. Lock rotation only on grain-matched faces; free the rest. More rotations almost always mean tighter packing and higher yield.
Group parts by material and thickness first
You can only cut same-material, same-thickness parts from one sheet. Mixing 18 mm and 12 mm parts in one run produces a layout you can’t use. Sort into groups, then optimize each group on its own stock.
Feed usable offcuts back in as stock
Save the offcuts on your rack to the Offcut inventory. With Use off-cuts automatically on, the optimizer packs parts onto them before it reaches for a fresh sheet; a piece moved into the stock table with ↑ is starred and used first. Filling the job from paid-for scrap first is the single fastest way to lift effective yield across projects.
Re-run and compare before committing
Run the layout, read the yield, adjust an input, and run again. Because the optimizer tests combinations in seconds, comparing two or three versions costs nothing and routinely finds a sheet you would otherwise have bought.
💰 Estimate the savings from higher yield
Common Mistakes When Reading Yield
Treating yield as one fixed target for every job. A run of thirty odd-sized parts can’t reach the yield of a run of identical shelves — the geometry won’t allow it. Chasing an absolute number leads you to over-cut and second-guess good layouts. Compare each job’s yield against similar jobs, not against a single benchmark.
Reporting yield without kerf. A yield figure that ignores the blade overstates real utilization, and the parts come up short on the shop floor. Always enter kerf so the number reflects the cuts you will actually make.
Counting large offcuts as waste. A 600×400 mm piece dropped in the “waste” column understates your yield and hides reusable stock. Log offcuts above your minimum size as inventory and exclude them from the waste total — they are future parts, not scrap.
Track yield per job type, not as one shop-wide average. Your drawer-box jobs and your countertop jobs live in different yield ranges, and blending them hides which work is actually leaking material.
When Chasing 100% Yield Is the Wrong Goal
Maximizing yield isn’t always the right call — sometimes a slightly lower yield saves time, protects a grain match, or leaves you a useful offcut. Knowing when to stop is as much a skill as knowing how to optimize.
On a small batch, the setup time to squeeze out one more part can cost more than the material it saves. On visible casework, keeping a grain match across adjacent panels matters more than the few percent of yield it costs. And a single large, clean offcut is often worth more back on the rack than sliced into the current layout to nudge the number up. Yield is a tool for spending material wisely — not a score to max out at any price.
See your real material yield on every layout.
CutOptim reports utilization for each sheet and board — no signup required. · 2 free runs without an account, then 3 a month with a free account
Optimize a cut list freeFrequently asked questions
What is material yield in cutting optimization?
How do you calculate material yield?
What is a good material yield percentage?
What is the difference between material yield and waste?
Does blade kerf reduce material yield?
Can you always reach 100% material yield?
Related
Ready to optimize your cuts?
2 free runs without an account, then 3 a month with a free account
Open App